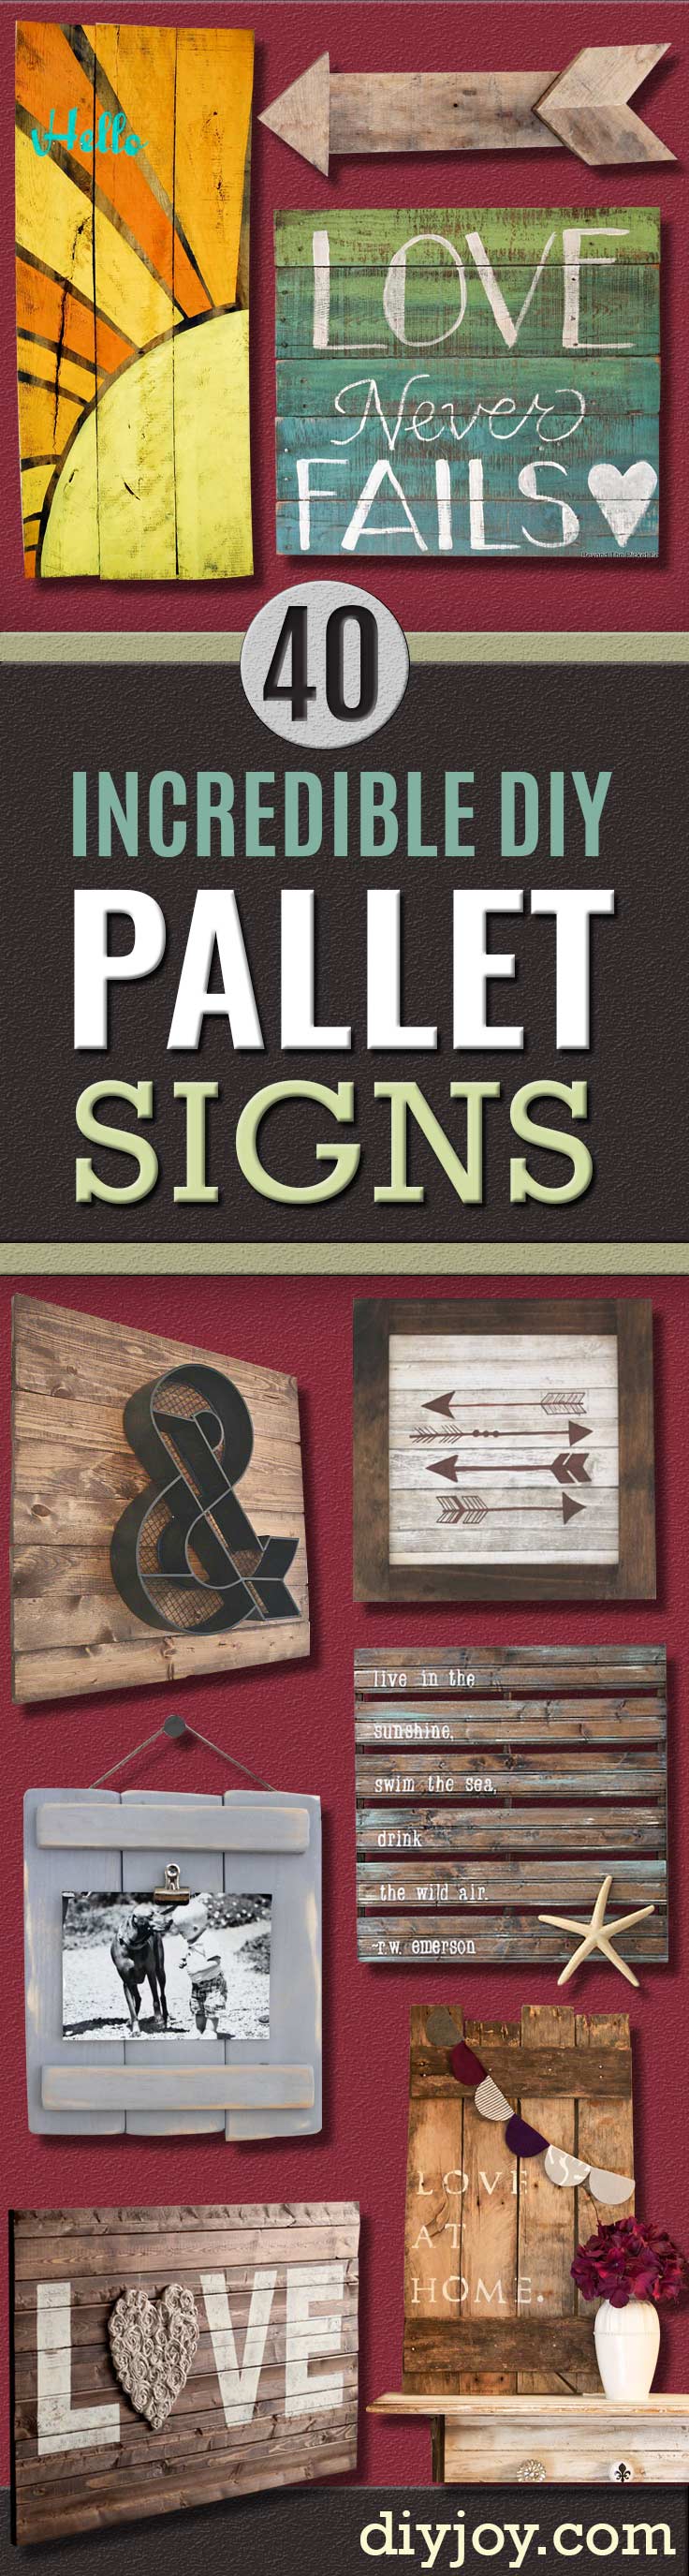
A stack of free pallets behind a hardware store is really a sign shop waiting to happen. These 23 DIY pallet signs cover every skill level, from a single stenciled board for the front door to a hand painted vintage telephone logo that looks like a flea market find. Pallet signs are salvaged slats braced together from behind, then painted, stained, stenciled or even stitched, and the rough grain does half the decorating. A few use craft store slat boards or wall paneling for the same rustic look without any prying. Expect welcome signs, a monogrammed family name, a laundry room joke, a storybook nursery sign and an embroidered hello. One tip before the hunt: look for the HT stamp, which means the pallet was heat treated, and skip any marked MB. Find more on the pallet projects hub.
DIY Pallet Signs With Tutorials
1. Hello Sunshine Wall Sign
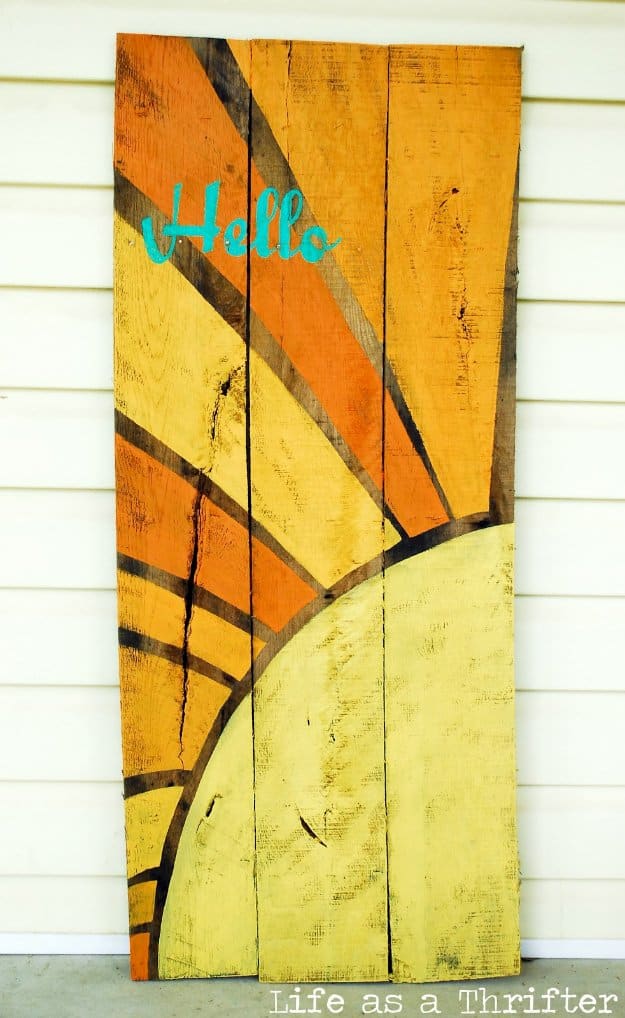
This hello sunshine wall sign turns a tall stack of pallet boards into a piece of folk art. Freehand a big sun rising from one bottom corner, with rays fanning up and across the planks, and don’t worry about perfectly straight lines. Mix leftover paints into several shades of yellow, gold and orange so every ray looks a little different, then paint, paint, paint. Stencil the greeting across the top, then sand the edges for a worn finish. It’s a cheerful way to use up half empty sample pots.
Get the full tutorial at Life as a Thrifter.
2. DIY Pallet American Flag
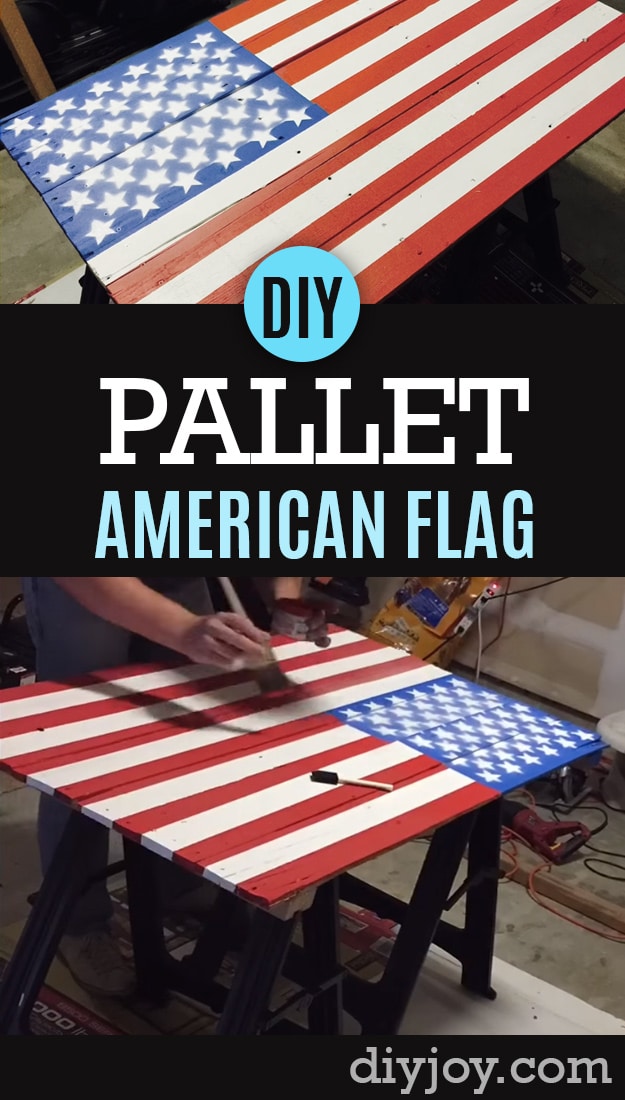
An American flag pallet sign is one of those rustic pieces that sells for a lot at craft fairs and costs very little to make. Brace a set of pallet boards together from the back so they act as one panel. Paint the stripes in red and white, then paint the upper corner navy and fill it with a star stencil in white. A light sanding once everything is dry lets the wood grain and nail holes show through. Hang it on the porch for Memorial Day and the Fourth of July.
Get the full tutorial at DIY JOY.
3. Two-Color Ombre Wood Pallet Sign
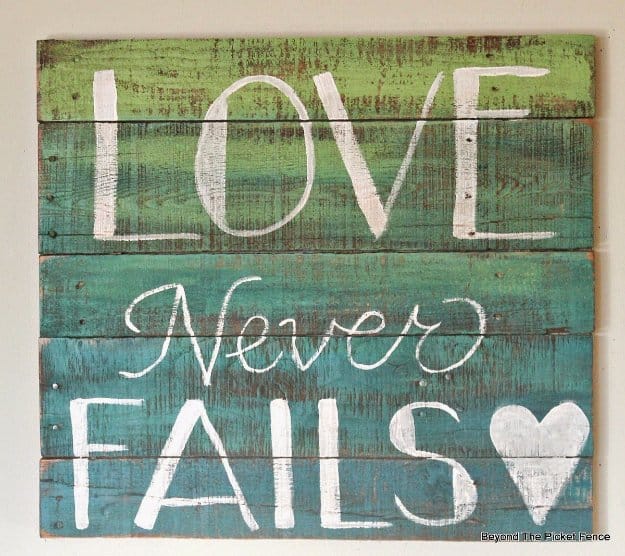
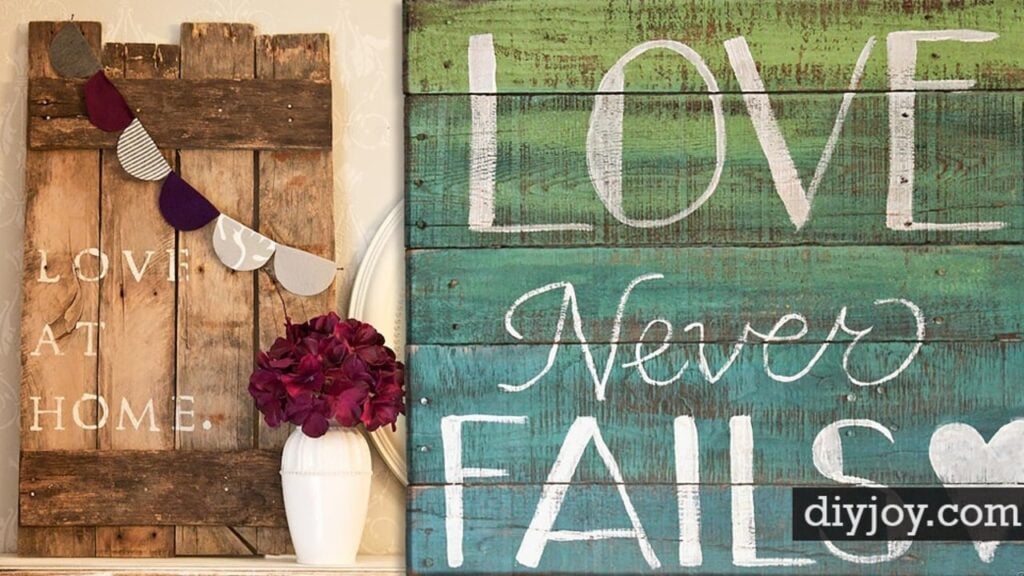
This two-color ombre wood pallet sign blends teal into bright green across the boards. Paint teal on one end board and green on the other, then work inward: each board gets a little of its neighbor’s color first and its own on top, and the middle board gets an even mix. Pour paint onto a paper plate, because the colors will mingle. Sand lightly, chalk on the lettering and paint it in white semi-gloss latex enamel so it stays bright. A coat of Early American stain over everything ages it beautifully.
Get the full tutorial at Beyond The Picket Fence.
4. DIY Wood Pallet Arrow
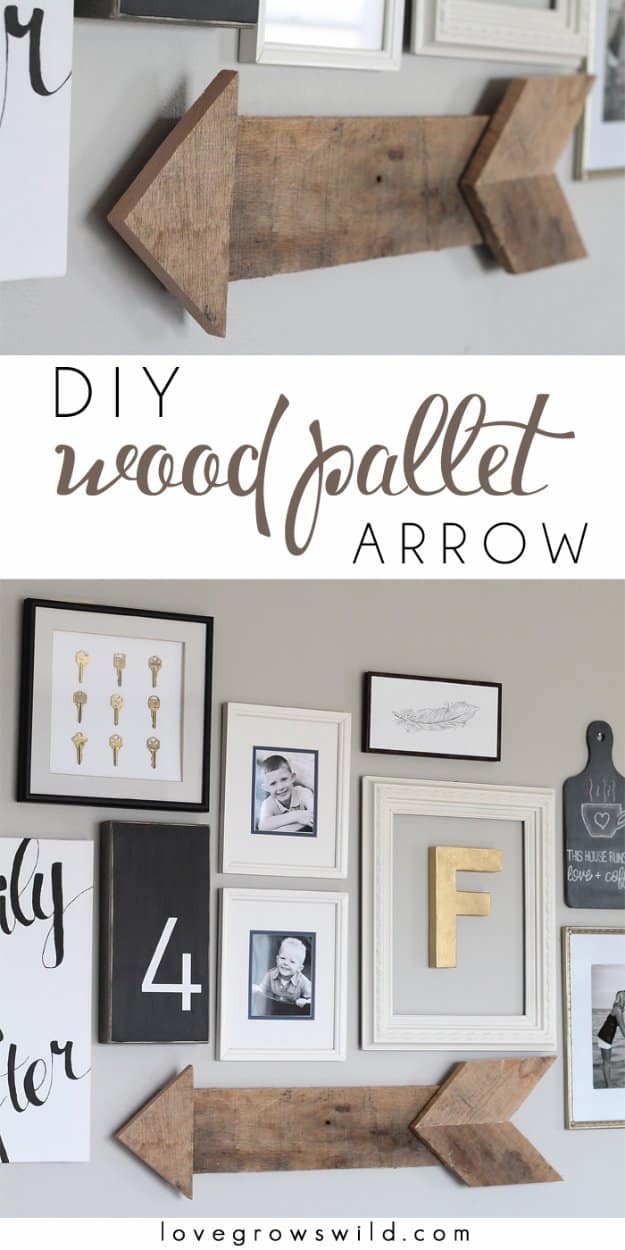
A DIY wood pallet arrow needs only two pallet boards, and it’s a great first pallet project. Cutting straight through the nails with a reciprocating saw is much faster than prying the boards apart. Cut a 5 1/4 inch wide board to 24 inches for the shaft. The tip is an 8 1/2 inch piece with two 40 degree cuts meeting in the center, and the tail is two pieces cut on a 45 degree angle. Wood glue, clamps and a few screws from the back hold it together, and a sawtooth hanger finishes it off.
Get the full tutorial at Love Grows Wild.
5. Pineapple Wooden Welcome Art – Upcycled Pallet Art
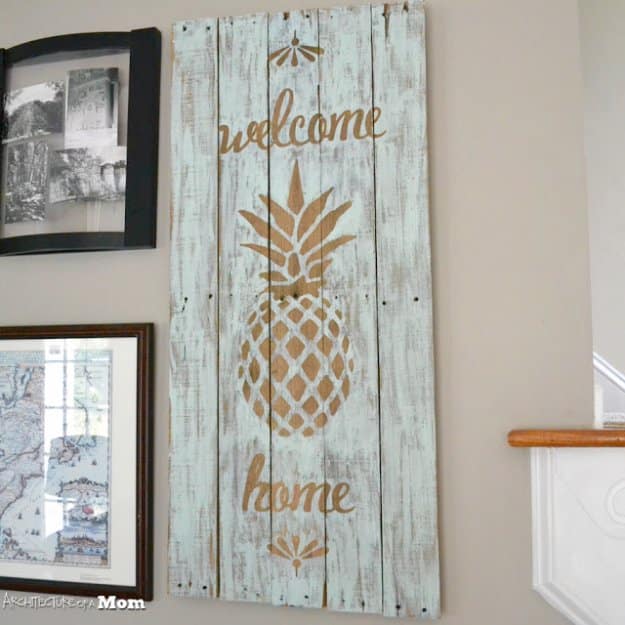
Pineapple wooden welcome art leans on an old Southern symbol of hospitality. Nail the pallet boards to a couple of cross pieces on the back, then cut the pineapple and lettering from scrap vinyl, in sections if the cutting machine is small. Transfer the vinyl with clear contact paper, press it into the uneven wood and seal the edges with matte Mod Podge. Dry brush a pale aqua over the whole board, peel the vinyl once dry and sand the rough spots. The raw wood shows through as the design.
Get the full tutorial at Architecture of a Mom.
6. DIY Pallet Plaques
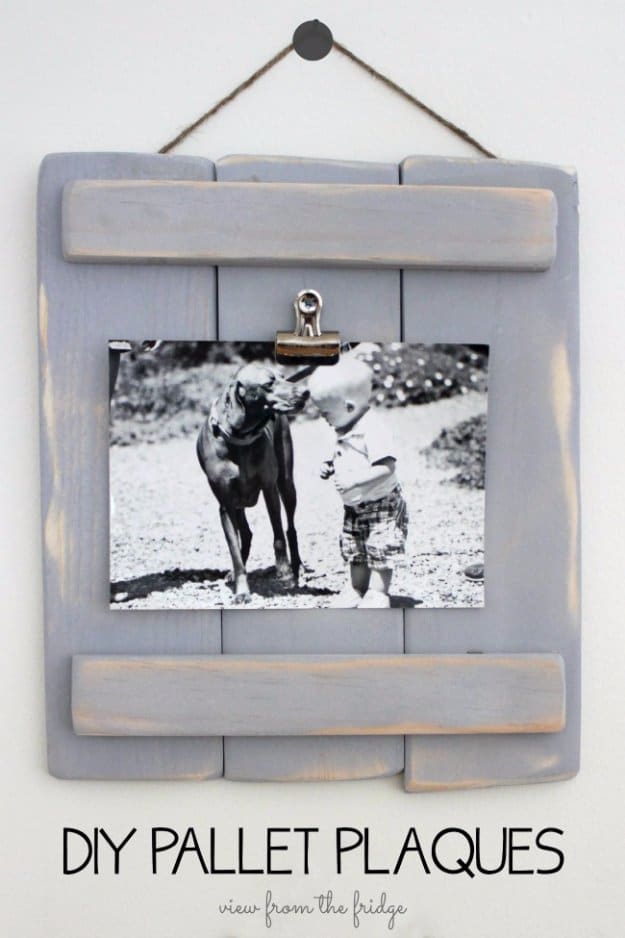
DIY pallet plaques are a rustic stand-in for picture frames, built from craft boards rather than a real pallet. Cut a 3 inch board into three 12 inch pieces and a 2 inch board into two 8 inch crosspieces, then sand every edge and corner for a worn look. Thin gray chalk paint with an equal amount of water so the grain shows through like a stain. Glue the crosspieces across the top and bottom, staple on a jute hanger and screw a bulldog clip to the front. Photos or art swap in seconds.
Get the full tutorial at Oh My Creative.
7. Reclaimed Wood Love Rope Sign
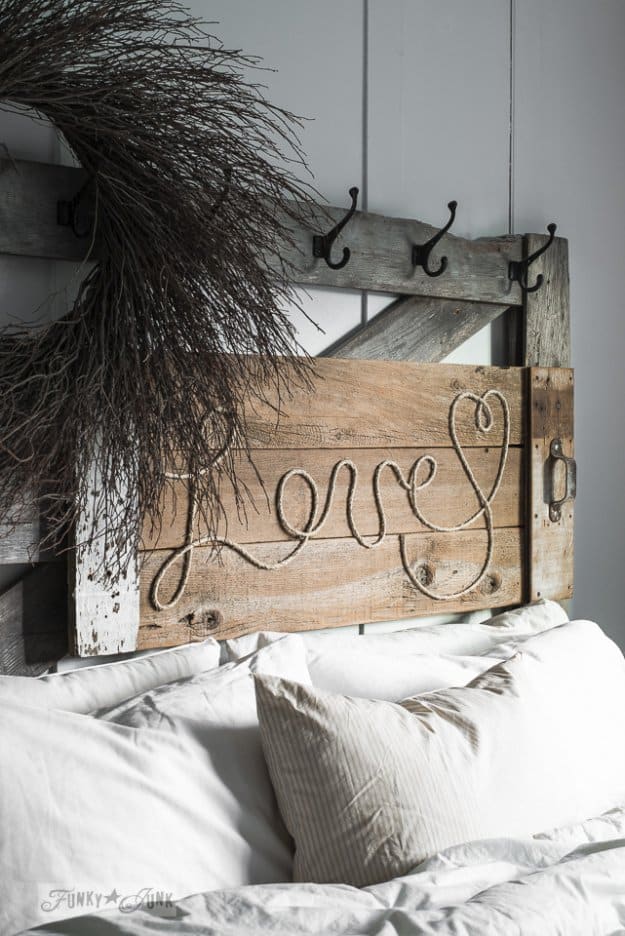
A reclaimed wood love rope sign spells a word in twine on weathered planks. Sketch the word on paper first in a script that never lifts, then chalk it onto three loose fence boards. Run hot glue a few inches at a time along the chalk line and press heavy twine into it right away, since the glue sets almost instantly. Curl the end into a heart, or cut the rope between letters for any word you want. It works for Valentine’s Day, but it’s neutral enough to stay up all year.
Get the full tutorial at Funky Junk Interiors.
8. Where the Wild Things Are Pallet Sign
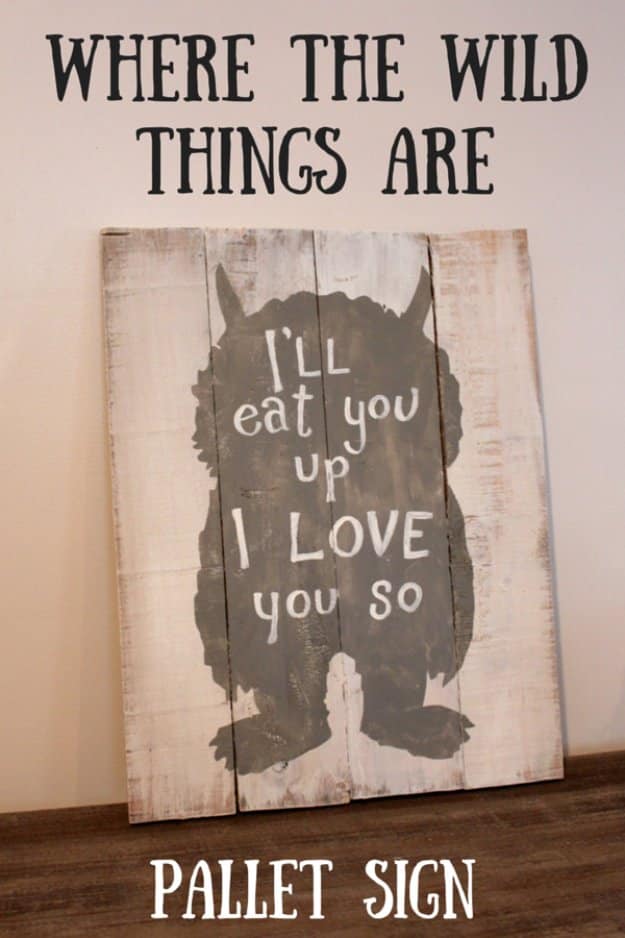
This Where the Wild Things Are pallet sign is made for a storybook nursery. Cut four pallet boards to equal lengths, about 14 by 18 inches overall, and nail two backing strips across them, angling the nails so the boards can’t pull loose. Sand the front lightly since it’s going in a baby’s room. One coat of white chalk paint covers the porous wood fast. A vinyl monster stencil, smoothed down with a scraper so paint can’t bleed, gets filled in gray, then the white lettering goes on top.
Get the full tutorial at Weekend Craft.
9. DIY Embroidered Pallet Wood Art
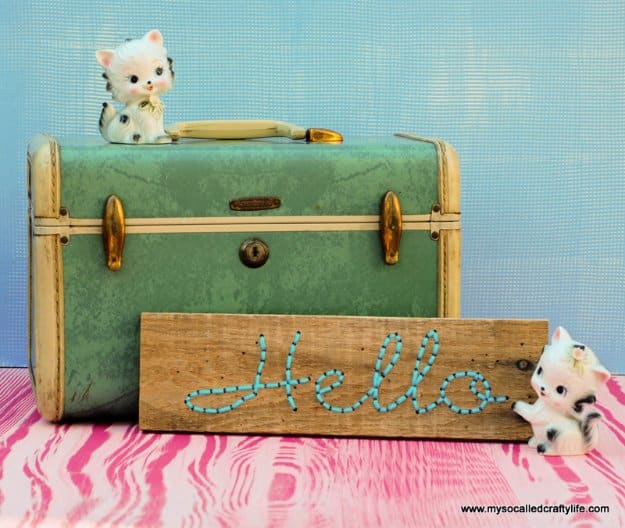
DIY embroidered pallet wood art stitches a word right into the grain. Print the word sized to fit a board about 3 1/2 inches tall and tape it in place. Punch a hole every half inch along each letter with an awl, a little closer on the curves, then remove the paper and drill through every mark with a 1/8 inch bit. Clean off the dust, thread a large yarn needle and back stitch through the holes. A sawtooth hanger on the back finishes it. It’s slow work, but very relaxing.
Get the full tutorial at My So Called Crafty Life.
10. Vintage Style Telephone Sign DIY
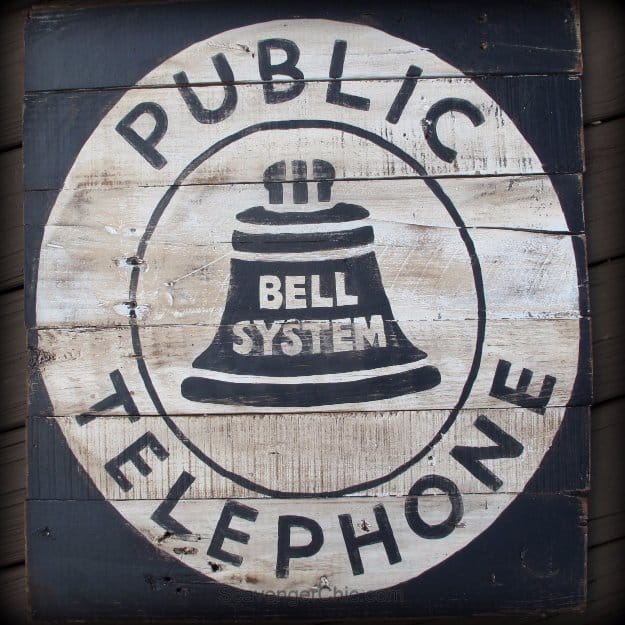
This vintage style telephone sign recreates an old Bell System public phone logo on pallet wood. Lay out boards about 25 inches square and nail cross braces on the back. Sand the front smooth enough to paint and roll on leftover white latex. Enlarge the logo, print it across several pages and tape them together, then scribble pencil on the back and trace the design to transfer it. Paint it in black, sand it again with a palm sander and rub on tinted wax to bring out the worn edges.
Get the full tutorial at Scavenger Chic.
11. DIY Acrylic Pallet Sign
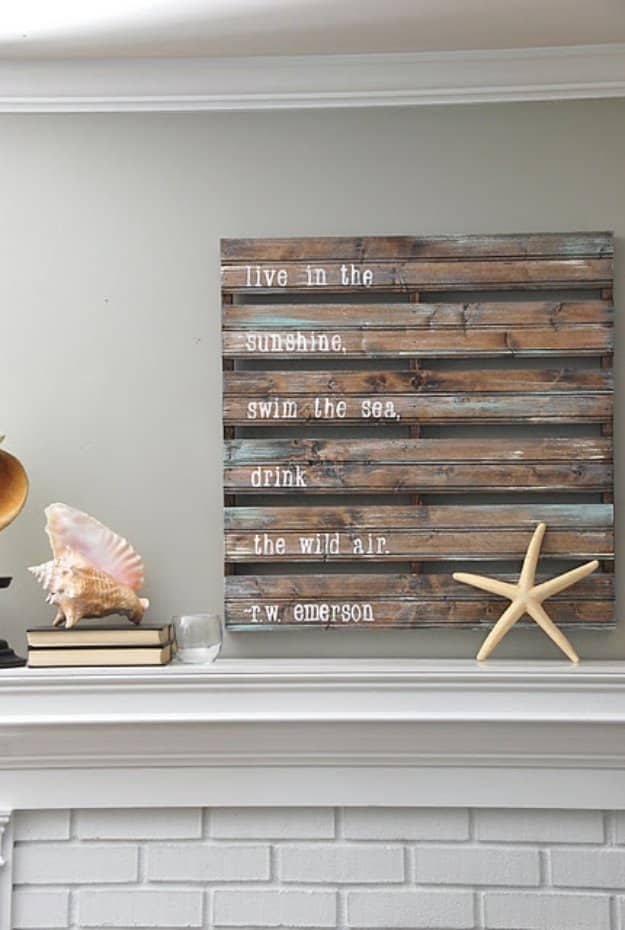
This acrylic pallet sign started as leftover beadboard strips, framed from behind so the boards sit together like a pallet. Rub on a light coat of dark walnut stain, just enough for color, and let it dry. Then brush on thin coats of acrylic paint in a few shades, keeping them light so the stain and grain show through for a weathered look. Foam letter stencils add a favorite quote. It sits beautifully with jars of shells, and the more it weathers on a patio, the better it looks.
Get the full tutorial at Blue Eyed Yonder.
12. DIY Welcome Pallet Wood Sign
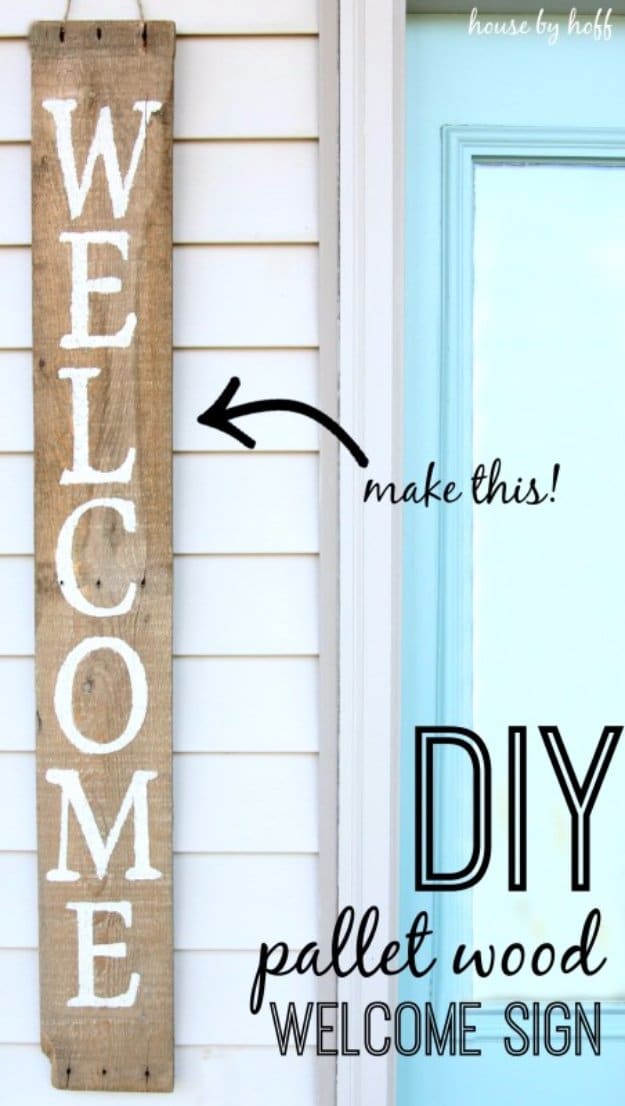
A DIY welcome pallet wood sign can be as simple as one long board and a stencil. Brush the dust off a single pallet plank, cut a stencil for the word WELCOME running top to bottom and paint it in a creamy white. Leftover furniture paint works fine. Hang it vertically beside the front door, where a narrow sign fits better than a wide one. On vinyl siding, a siding hanger slides between the boards and holds it without any nails. Add a few potted flowers on the stoop and it’s done.
Get the full tutorial at House by Hoff.
13. Rustic Blessed Sign
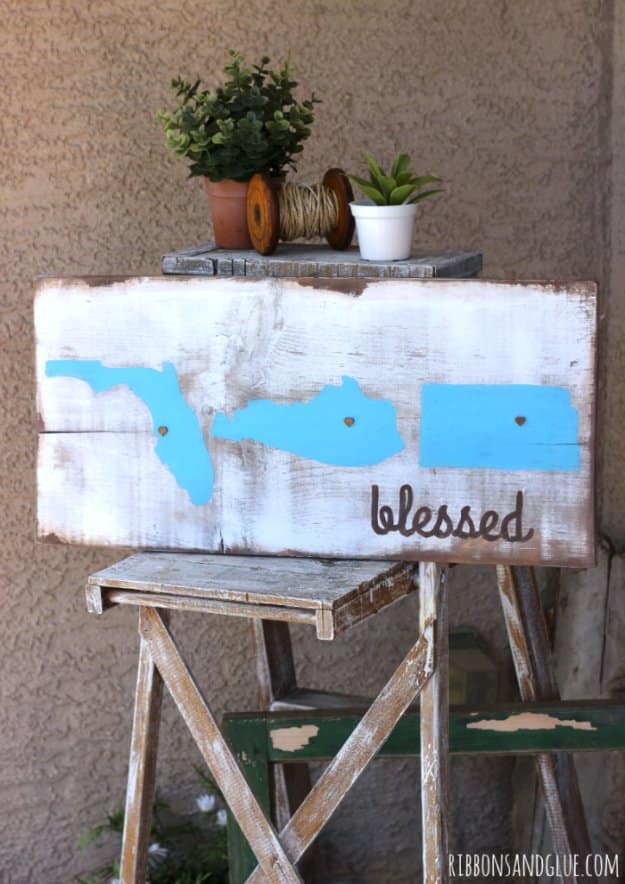
This rustic blessed sign gets its chippy look from a jar of petroleum jelly. Stain a plain wood board in a dark walnut tone and let it dry. Smear petroleum jelly with your fingers wherever the stain should peek through, then spray the whole board white in a few coats, since a brush would just push the jelly around. Wipe the greased spots with a paper towel and the paint lifts right off. Sand any other edges for extra wear, then add state shapes with a heart and the word blessed.
Get the full tutorial at Ribbons & Glue.
14. DIY Silhouette Pallet Wood Sign
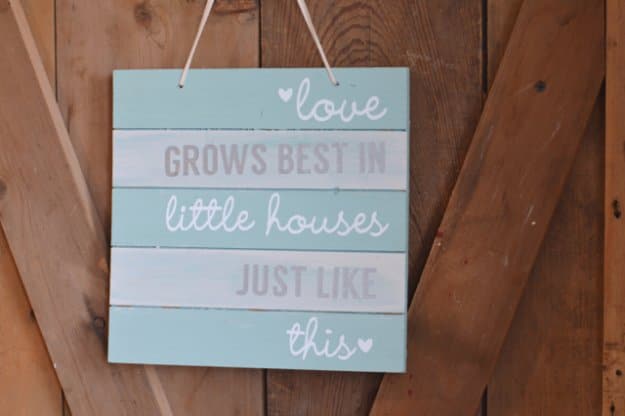
This DIY Silhouette pallet wood sign starts with a ready made, unfinished pallet board from the craft store. Paint the slats in two alternating colors for a striped base. Then cut the quote from glossy vinyl, alternating white and silver letters, and apply it with transfer paper. The finished sign reads “love grows best in little houses”, a sweet reminder for anyone in a small space, and the cut file is free to download. Flip the design and it works on a shirt with heat transfer vinyl too.
Get the full tutorial at NewlyWoodwards.
15. Paneling Wall Hanging Art
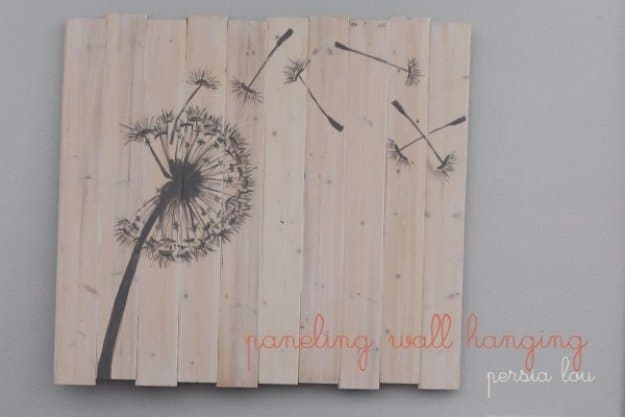
Paneling wall hanging art fills a big empty wall for under ten dollars. Pick the knottiest planks from a package of tongue and groove wall paneling and fit them together, staggering the ends instead of lining them up. Glue two scrap boards across the back with construction adhesive. A white wash pickling stain lightens the wood, or water down white paint for the same effect. Pencil in some guidelines and paint a blowing dandelion with a sample pot. Notches in the back boards give it a place to hang.
Get the full tutorial at Persia Lou.
16. DIY Hello Sign With Wood Shims
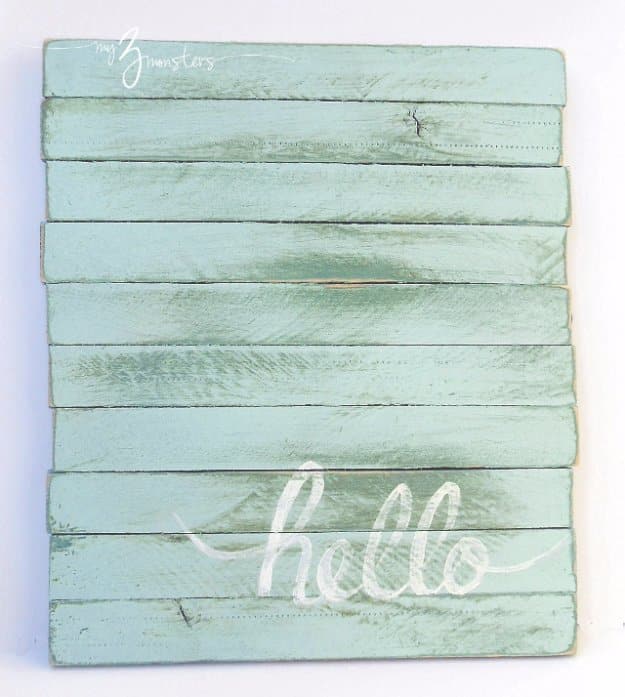
This DIY hello sign is a mini pallet built from a contractor pack of wood shims, which are longer and wider than the regular ones. Since shims taper very thin, glue them in pairs for strength: 13 pairs here, 10 for the front and 3 across the back as braces. Leave the edges a little uneven on purpose. Spray on several coats in three colors, finishing with a soft aqua, then sand to let the layers and bare wood show. Paint one small, happy word near the bottom corner.
Get the full tutorial at My 3 Monsters.
17. How to Letter a Pallet Sign Without the Machine
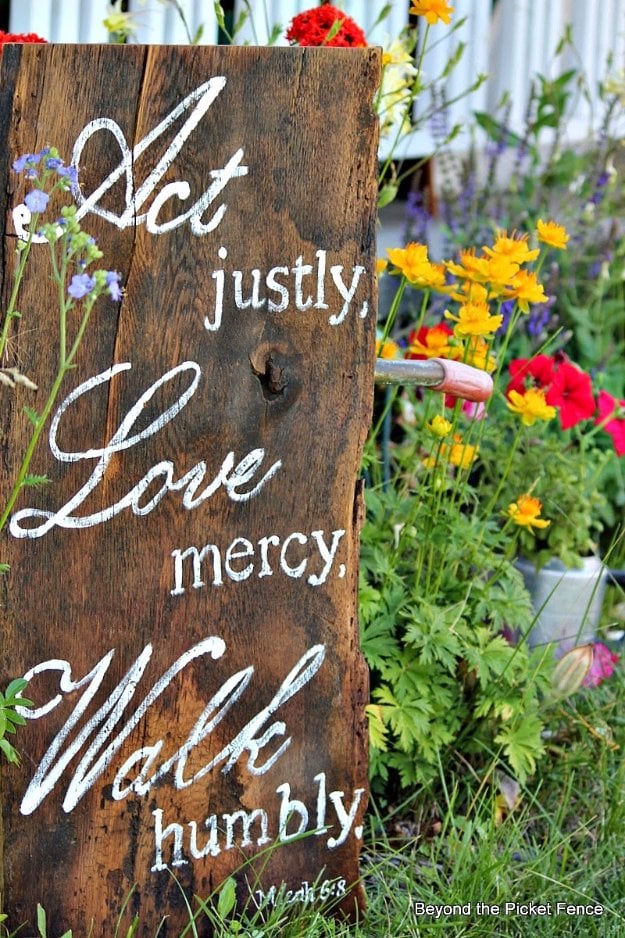
Learning how to letter a pallet sign without a cutting machine takes just a printer and a pen. Lay out the words in a word processor, enlarge them and print them in outline to save ink, taping pages together as needed. Rub chalk over the back for dark wood, or pencil for light wood. Tape the pages to the board and trace each letter firmly with a ballpoint pen, then fill them in with a brush. Small wobbles add charm, and big mistakes sand right off. A clear spray seals it.
Get the full tutorial at Beyond The Picket Fence.
18. Free Cut File Pallet Sign
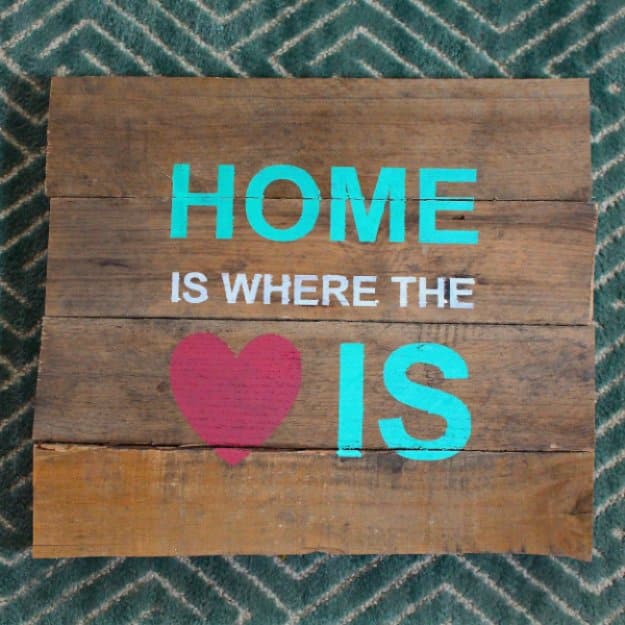
This free cut file pallet sign uses a vinyl stencil for crisp, custom letters. The “Home is where the heart is” design is free to download. Cut it on a mat with vinyl settings, then peel the vinyl back low and slow so the letters and the outline both survive as two usable stencils. Center the stencil on assembled pallet boards and smooth it with a scraper or credit card to seal the edges. Dab on latex sample paint lightly so nothing bleeds, then peel once it’s semi dry.
Get the full tutorial at Weekend Craft.
19. DIY Pallet Photo Transfer Art
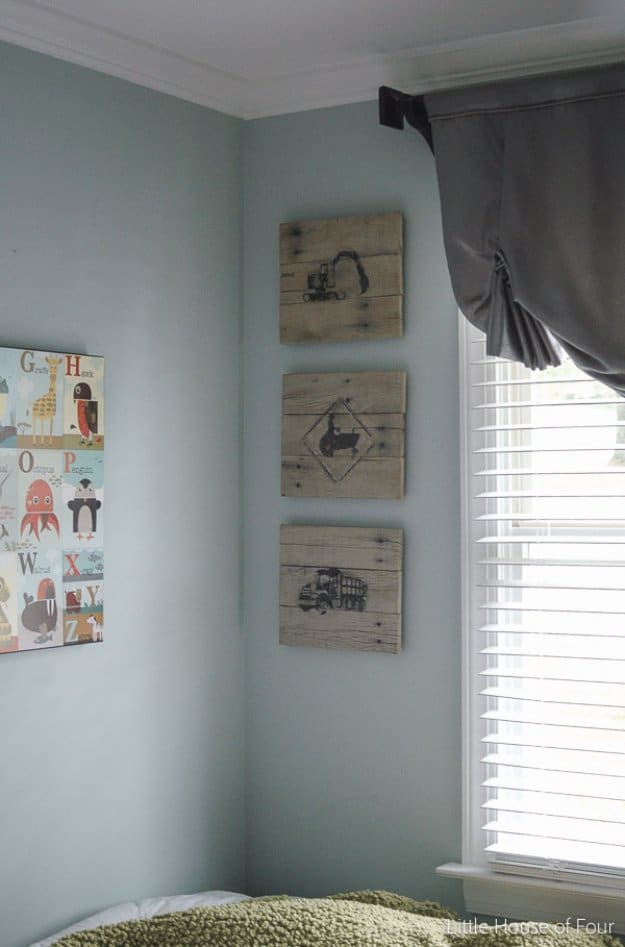
DIY pallet photo transfer art puts a printed picture right onto the wood. Cut long pallet boards into nine equal pieces, then glue and nail short 1 by 1/2 inch strips behind them to make three square panels that stand off the wall. White wash them with equal parts paint and water. Coat the front of each printed silhouette with Mod Podge, lay it face down on the wood and smooth it firmly. When it’s almost dry, dampen the paper with a wet rag and rub it away to reveal the image.
Get the full tutorial at Little House of Four.
20. Bingo Wood Pallet Sign
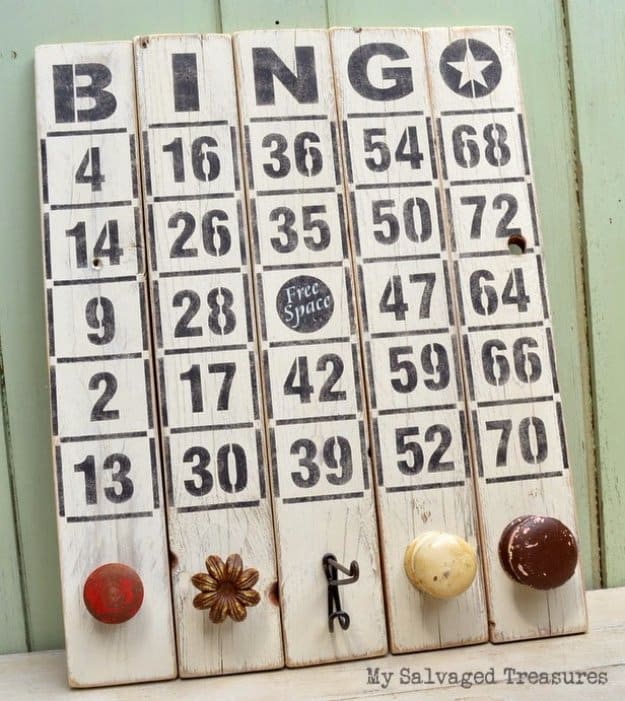
This bingo wood pallet sign splits a 14 by 14 inch stencil across five narrow pallet boards, one for each letter of BINGO. Give the boards a single coat of yellow chalk paint without bothering to fill the nail holes. Tape the stencil down and pounce black acrylic with a very dry brush so nothing seeps underneath, then paint the free space in the background color. Leave about 4 inches at the bottom of each board for an old wooden knob or a rusty hook. Hang them together or spread them out.
Get the full tutorial at My Salvaged Treasures.
21. Laundry Room Pallet Sign
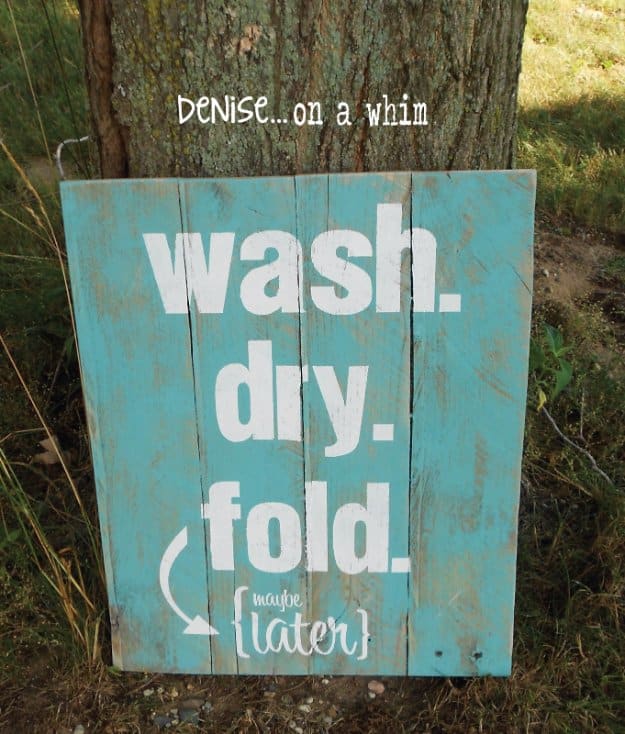
A laundry room pallet sign with the words “wash. dry. fold. maybe later” is honest about how laundry day really goes. This version is painted in a teal green chalk based paint with vintage white lettering, a combination that’s sold out at local craft shows again and again. Build a small pallet panel, paint the background, then transfer the free printable design onto the boards and fill in the letters. Hang it above the washer or lean it on a shelf with the detergent and a jar of clothespins.
Get the full tutorial at Denise on a whim.
22. Monogram Pallet Family Name Sign
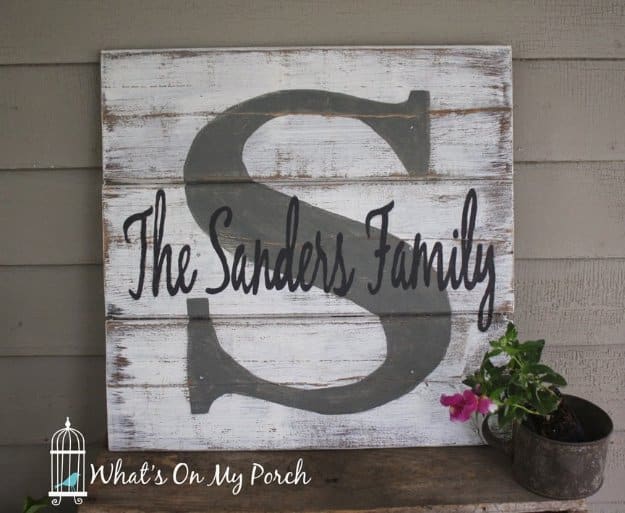
A monogram pallet family name sign pairs one giant initial with the family name in script. Build a square of three pallet boards, about 16 by 16 inches, and stain it walnut. Let it dry overnight. Brush on white paint heavier in the middle, then dry brush in from the edges so they stay dark, and sand lightly once dry. Print the big letter across several sheets, transfer it with graphite transfer paper and paint it gray. The family name goes on top in black script the same way.
Get the full tutorial at My Porch Prints.
23. DIY Pallet Welcome Sign
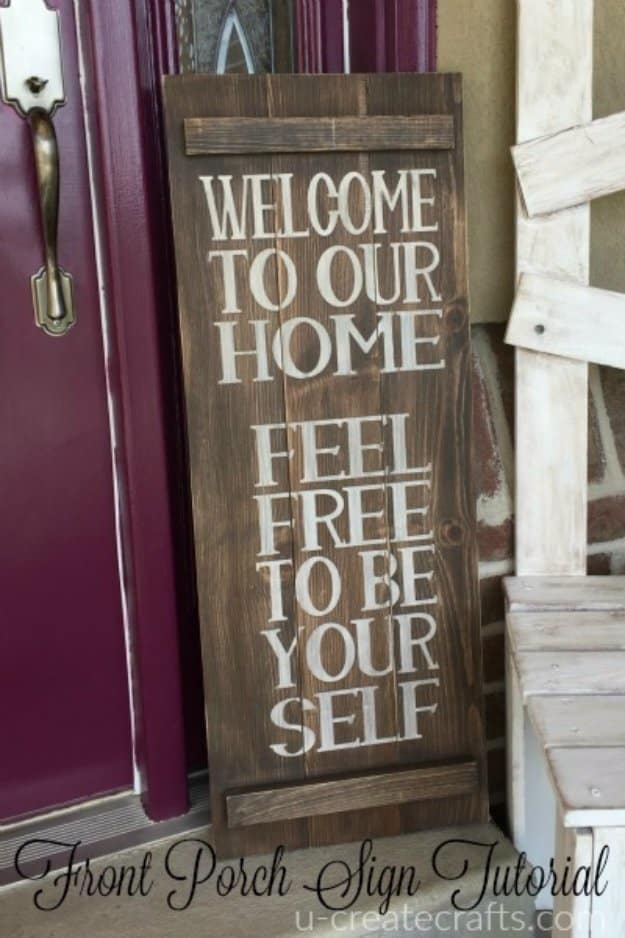
This DIY pallet welcome sign uses a slat board about 11 by 18 inches and a vinyl stencil. Stain the wood dark, then seal it before anything else, because vinyl won’t stick well to raw stained wood. Press the stencil on carefully, in sections if it helps, chasing out every bubble so paint can’t creep under. Sponge on a light paint, add a second coat and peel the vinyl slowly. Smooth the letters with fine 180 grit sandpaper and finish with a spray acrylic sealer to protect it outdoors.
Get the full tutorial at U Create.